Direct answer: Start with a field you can water before midday, plant regrowing crops on day 1, keep one mixed plot for requests and museum crops, then expand only after the watering can or Growth spell removes the daily bottleneck.
Requirements
- A hoe, watering can, and season-valid seeds
- A field size that leaves time and stamina for one other daily objective
- Separate storage for museum, quest, seed, processing, and sale items
- The calendar for the 28-day deadline
Step-by-step
- Choose a rectangular crop block that matches the watering-can charge.
- Plant the best accessible regrower on day 1 and keep a smaller mixed plot.
- Water priority crops first and pause field expansion when chores reach midday.
- Protect the first crop copy, next planting stock, and active quest materials.
- Upgrade the watering can or use Growth when crop labor becomes the bottleneck.
- Add animals only after feed, buildings, storage, and the daily route are stable.
Farming basics
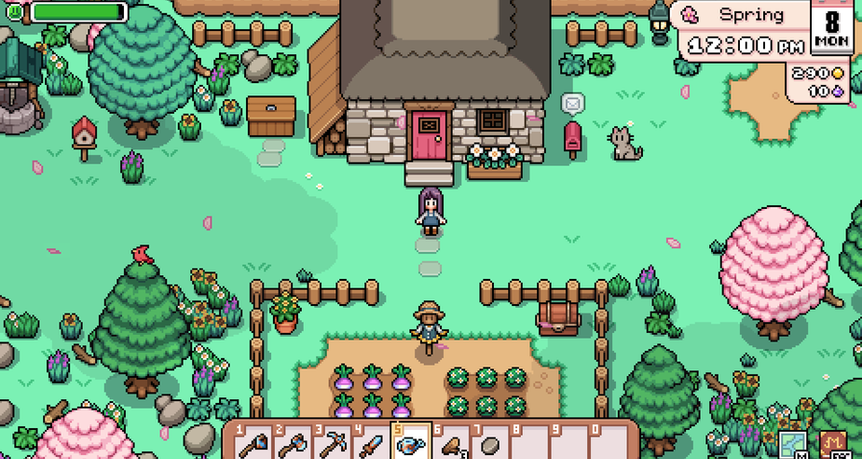
Each season lasts 28 days. Till soil with the hoe, plant a seed, and water it on every day you want growth to advance. Missing a watering does not kill the crop; it pauses growth or regrowth for that day. The real risk is reaching the season change before the next harvest.
Use this planting check:
remaining watered days >= days to first harvest
For a regrowing crop, calculate how many complete regrowth intervals fit after the first harvest. A crop with a high sale price can lose to a cheaper regrower when the regrower produces seven or eight times from one seed.
Best field size for each stage
| Stage | Practical field goal | Reason |
|---|---|---|
| First weeks | 24–40 tiles | Leaves stamina and time for town, mines, fishing, and quests |
| Copper tools | 40–80 tiles | Charged watering begins reducing input time |
| Iron or Silver tools | 80–150 tiles | Larger charge areas make blocks efficient |
| Late game | Expand by purpose, not maximum area | Automation, spells, animals, and processing become the constraints |
These are workload ranges, not hard limits. If watering pushes every other activity into the evening, the farm is already too large for the current tool tier.
A farm layout that stays easy to upgrade
Crop blocks
Use rectangular blocks sized around the current watering-can charge. Leave one-tile walking lanes between groups and keep the top or side edge unobstructed so charged watering can be aimed cleanly.
Storage zone
Place labeled chests between the farmhouse exit and shipping area:
- seeds and fertilizer;
- seasonal crops and forage;
- town and tool-upgrade materials;
- animal products and feed;
- museum candidates and quest items.
Separating “safe to sell” from “protected” inventory prevents most expensive mistakes.
Expansion lane
Keep one open corridor between crops, barns, and the farm exit. A decorative farm can still be efficient, but daily routes should not weave around fences and machines.
Seasonal crop plan
| Season | Strong full-season raw crop | Flexible alternative | Planning note |
|---|---|---|---|
| Spring | Peas | Strawberry or Turnip | Peas require expanded store access; Strawberry is the accessible regrower |
| Summer | Tea | Corn, Tomato, or Cucumber | Tea is a strong raw regrower after the store upgrade |
| Fall | Onion | Cranberry, Wheat, or Sweet Potato | Wheat gains value when processed |
| Winter | Snow Peas | Daikon or Beet | Farming continues normally in winter |
See best crops by season for seed cost, harvest count, gross revenue, and raw net profit. Keep at least a few different crop types for requests, recipes, museum needs, and resilience; a pure profit monoculture can force expensive shop purchases later.
Seed Maker strategy
After the General Store repair, the Seed Maker can be purchased for 2,000 Tesserae. It converts one crop or forage item into one to three seeds. That range means the machine is powerful but not guaranteed profit on every single input.
Use it when:
- seed cost is high relative to crop sale price;
- the crop is needed again next season or in large quantity;
- the seed sells for more than the raw crop and the output roll is favorable;
- you already protected cooking, request, museum, and gifting quantities.
Do not feed the only seasonal specimen into the machine. The Seed Maker is best as a multiplication tool after your baseline storage is secure.
Watering, stamina, and magic
Upgrade the watering can when crops dominate the morning. Charged tools cover larger areas at higher material tiers, turning field geometry into a major time saver. The Growth spell costs 2 mana and affects a one-square-radius area, so reserve it for valuable crop blocks, deadline recovery, or synchronized harvests rather than casting randomly.
If stamina is the bottleneck, shrink the field, use cooked food, and select broadly useful farming perks. If clock time is the bottleneck, improve charge alignment and route design before adding more food.
Animal farming
Animals are a separate production loop with upfront building, purchase, feed, and care requirements. Begin with a manageable number, establish reliable feed and product collection, then expand when daily care fits the crop route.
Priorities:
- Complete Hayden's barn and related town progression when more animal access is the goal.
- Maintain daily care and avoid buying more animals than the current building supports comfortably.
- Keep base-quality products for cooking and requests before processing or selling everything.
- Use ranching perks such as Close Bond and Barnyard Bounty when animals are a core income route.
- Treat breeding and rare products as long-term progression, not immediate early-game cash.
Tool and building upgrade order
For a crop-heavy save, a sensible priority is watering can, pickaxe, axe, hoe, then route-specific tools. The pickaxe stays near the top because ore gates every other tool tier. For a mine-heavy save, upgrade the pickaxe first and keep enough ingots protected for the watering can.
Town improvements also change farming economics. Use the town improvement quest order to protect the correct materials before selling farm resources:
- Bridge repair unlocks the Saturday Market.
- Mill restoration enables processing routes.
- General Store repair expands seed stock and unlocks the Seed Maker purchase.
- Hayden's barn upgrade expands ranching.
- Carpenter upgrades expand home and farm infrastructure.
Open the tool upgrade guide for exact ingot, skill-level, time, and shop-cost requirements.
Daily farming routine
- Check weather, mail, and the calendar before planting.
- Water priority regrowers first, then deadline crops, then flexible plots.
- Harvest and immediately separate museum, quest, seed, processing, and sale stacks.
- Care for animals while moving toward the farm exit.
- Ship only the labeled sale stack.
- Spend the remaining day on the current bottleneck: ore, wood, fishing, town rank, or relationships.
Common reasons it does not work
- Planting more tiles than the current watering can can handle.
- Buying a slow seed after its last safe planting day.
- Selling the first museum copy or every cooking ingredient.
- Spending upgrade ingots on gifts or low-priority requests.
- Building machines without leaving movement and loading space.
- Optimizing sale price per item instead of profit per tile and per day.
- Expanding animals before feed, buildings, and daily time are stable.
FAQ
What is the best first crop?
Use Turnips for quick liquidity and early requests, then move into Strawberry as the accessible Spring regrower. Peas become the stronger full-season raw option after the relevant store stock is available.
Do crops need water every day?
They need water for growth to advance. A missed day pauses the crop rather than killing it, but it can remove a planned harvest before day 28.
Should I sell crops raw or process them?
Compare the processed sale value with the raw crop, machine time, required ingredients, and perk effects. Process when the margin is worth the extra handling; sell raw when cash flow or time matters more.
How large should my farm be?
Large enough to fund your goals but small enough that watering and animal care do not consume the day. Upgrade tools before repeatedly adding new blocks.